How We Built a 6-Foot Bates Motel Sign (Free CNC + SVG Cut Files)
Published October 27, 2026
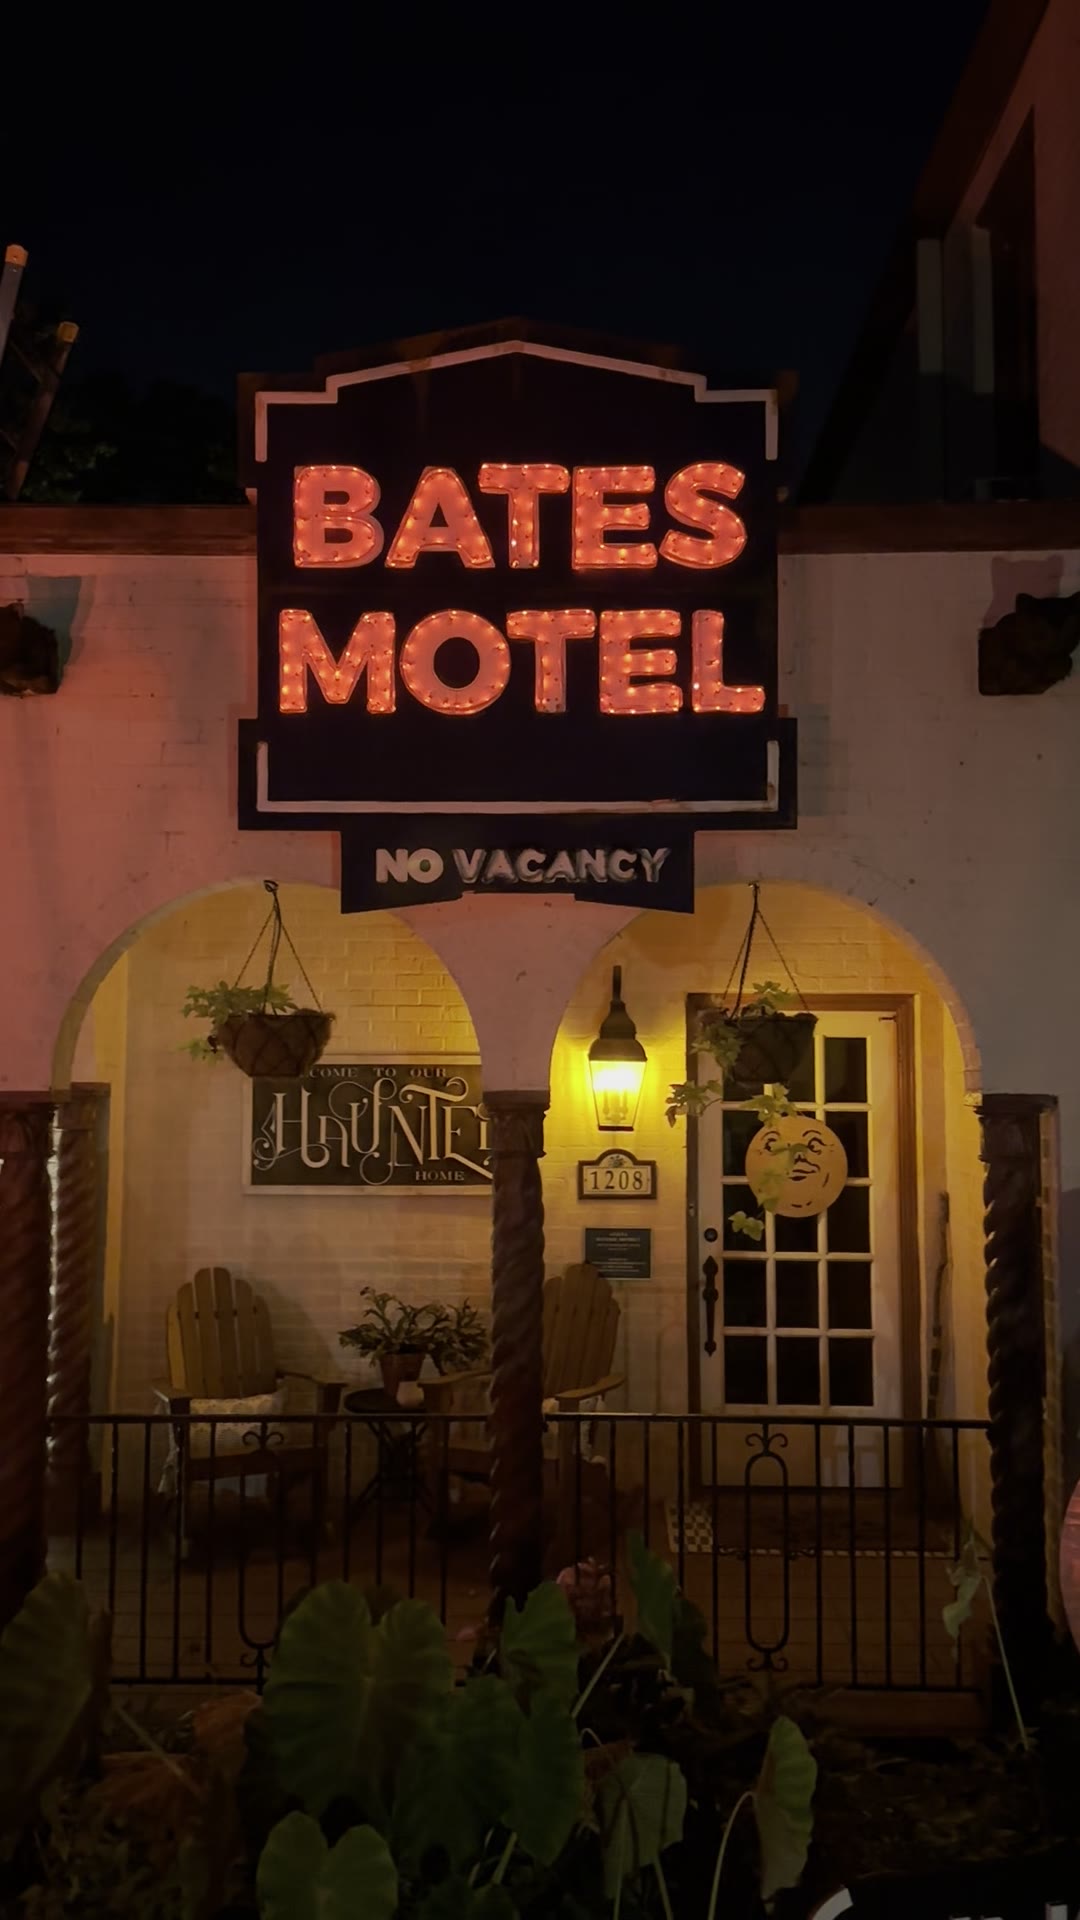
We're a family in Tyler's Azalea District who loves Halloween a completely normal amount. Every year we build our display from scratch, and last year that included a Bates Motel sign for the front of the house: 5.4 feet wide, almost 6 feet tall, with CNC-carved letters, rust stains, and faux neon that lights up.
This is our first build guide. We're giving away the cut files, the shopping list, and the part that broke, so you can build your own and skip our mistakes.
How we did it: we CNC-cut the sign in two plywood pieces, seamed them together, painted it with cheap Home Depot paint, faked the rust with watered-down rust paint, and made "neon" by running LED strip lights through clear vinyl tubing.
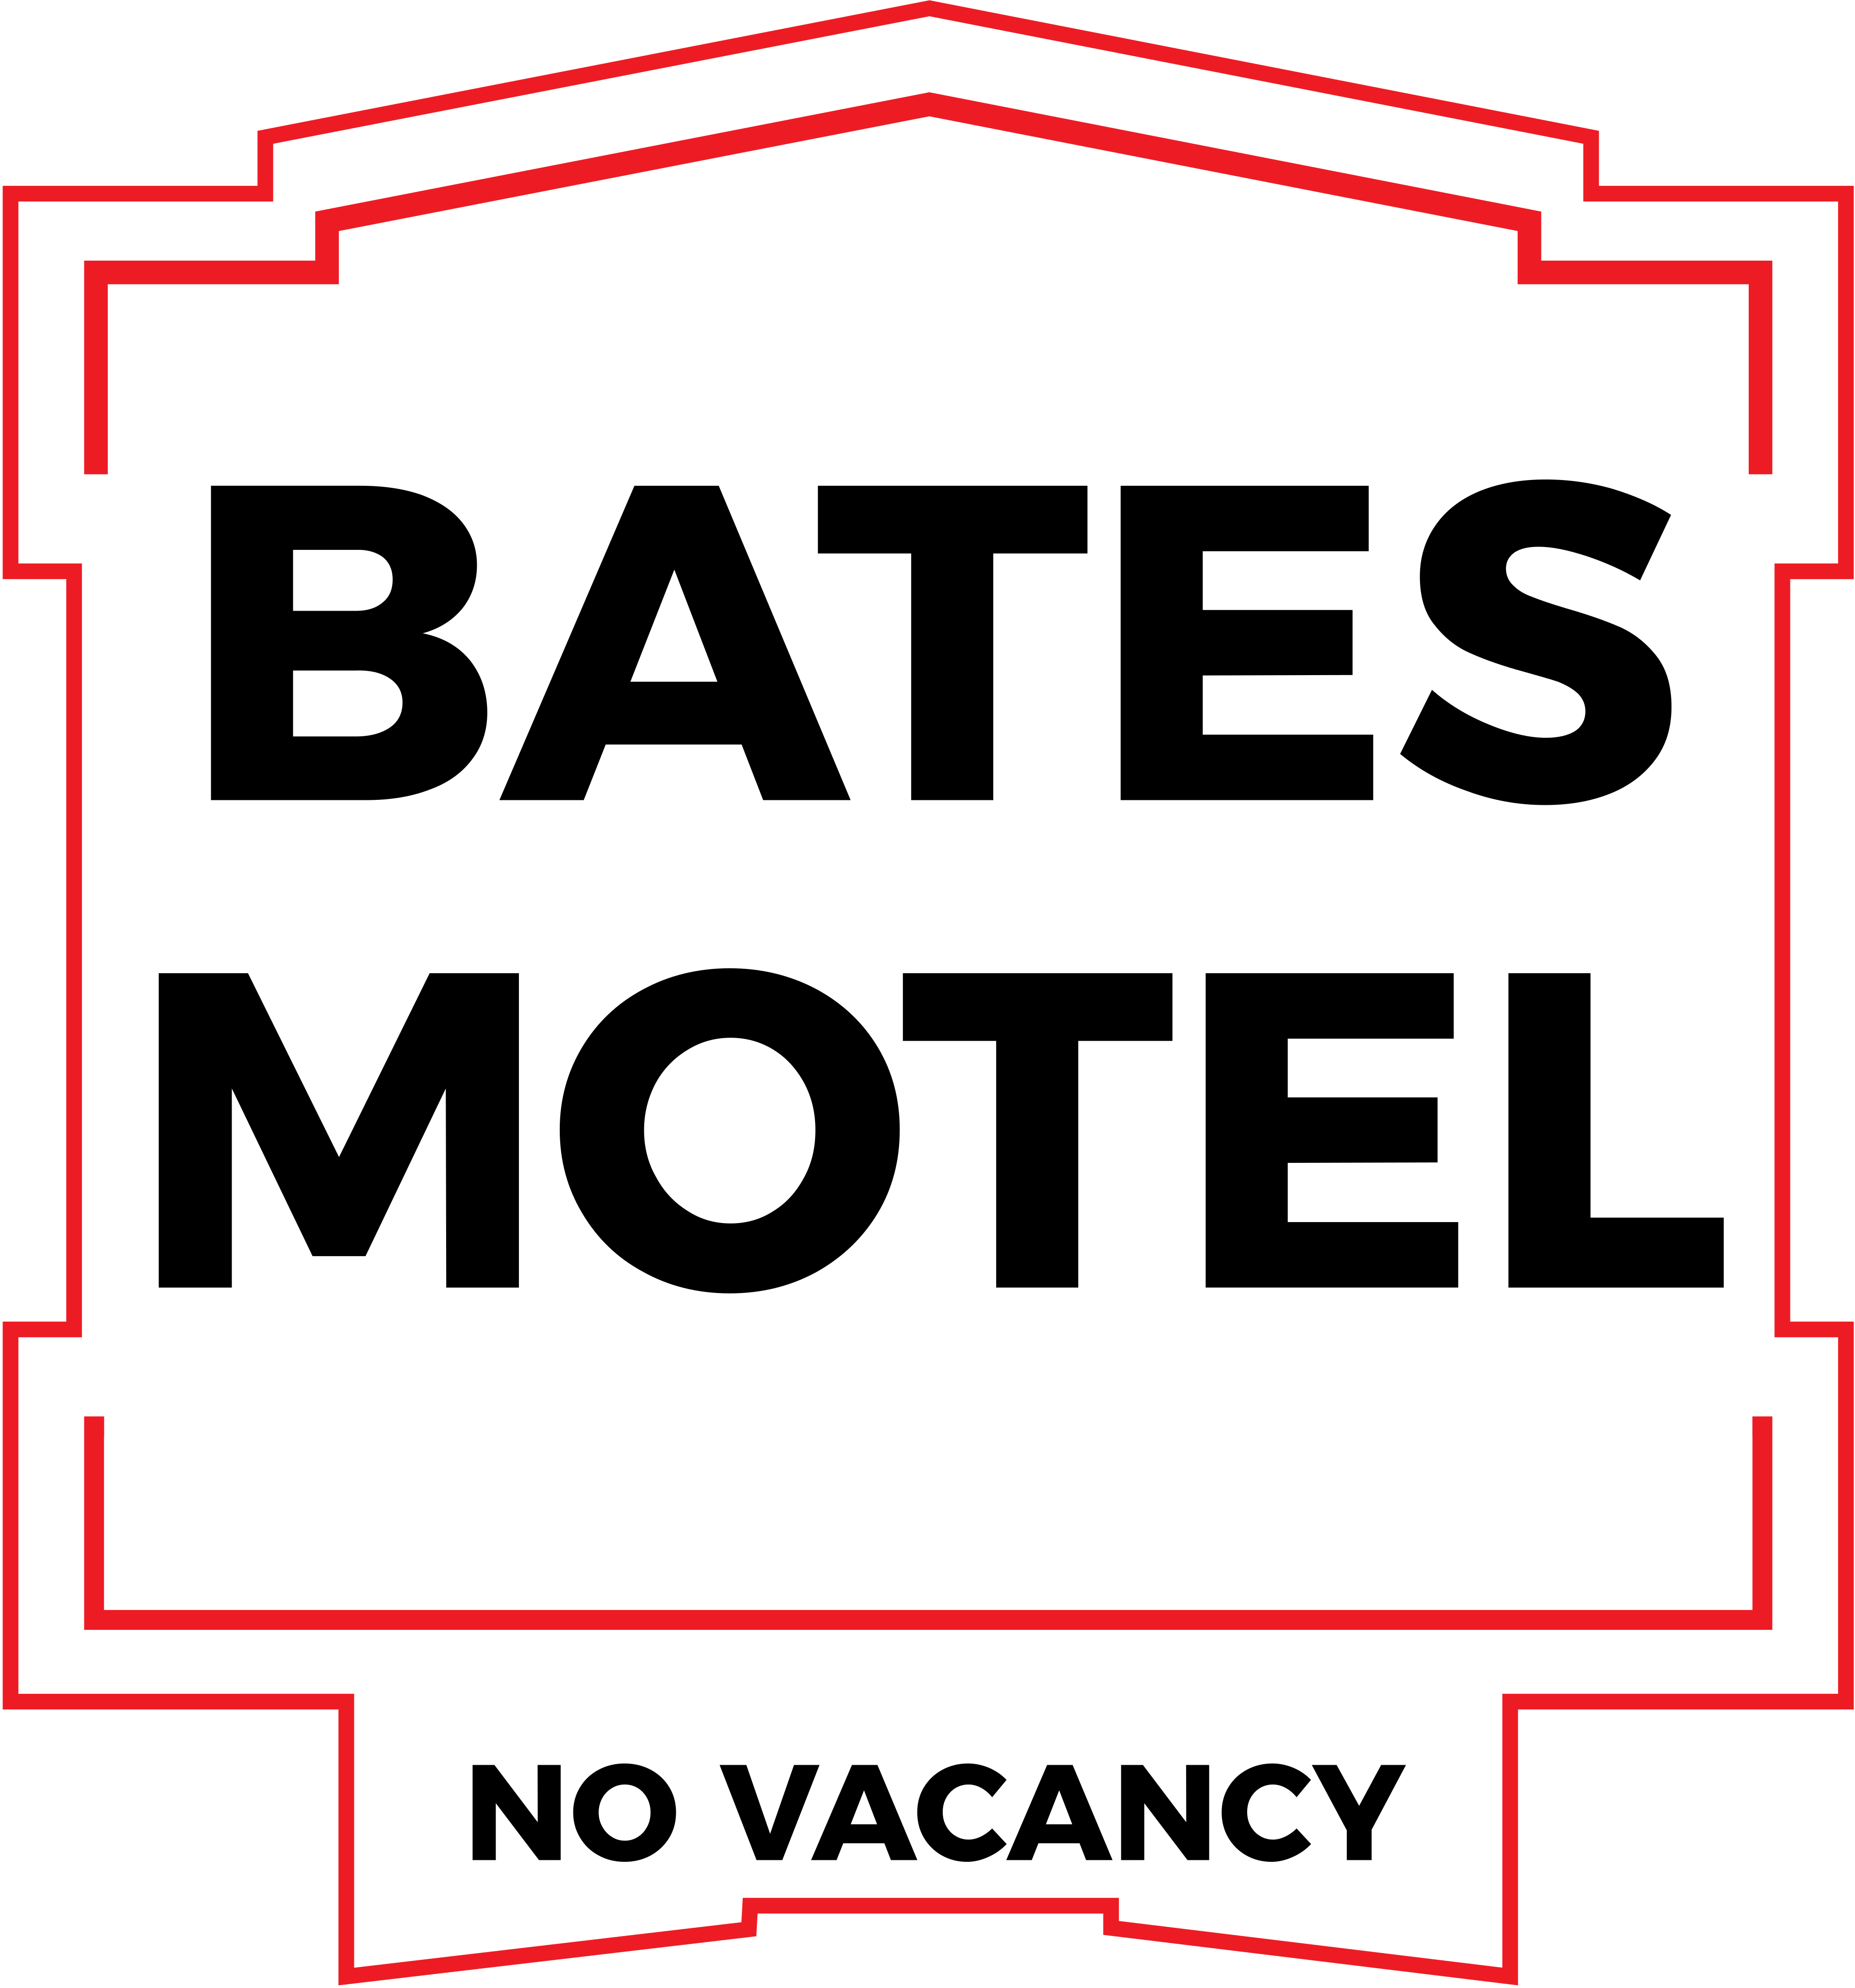
Free cut files
- Easel project for CNC (open it, copy it to your account, set your bit and material)
- SVG for Cricut, laser, jigsaw templates or other CAM software
- Printable full-size template (70 letter-size pages to tape together, no CNC needed)
| Spec | Detail |
|---|---|
| Finished size | 5.4 ft wide x about 6 ft tall |
| Main material | 1/2 in. pine plywood, cut in 2 pieces and seamed |
| Cutting method | MakerMade M2 CNC router (or the printable template and a jigsaw) |
| Paint | Basic, inexpensive Home Depot paint: blue base, white letters, rust color |
| Lighting | LED strip lights inside clear vinyl tubing |
| Difficulty | Intermediate (CNC + basic wiring) |
| Build time | Two weekends for us, figuring out each piece as we went. With this guide, one weekend is enough. |
| Inspired by | The Bates Motel sign from Psycho and A&E's Bates Motel |
Materials and tools
Some links below are affiliate links. As an Amazon Associate, we earn from qualifying purchases, at no extra cost to you. It helps cover the next build.
| Item | What we used | Notes |
|---|---|---|
| Sign | 1/2 in. pine plywood | Two pieces, because the sign is bigger than one 4 ft sheet. The letters are carved into the same plywood. |
| Seam backing | 1 in. x 2 in. boards, wood glue, nail gun | Glued and nailed along the back of the seam |
| CNC router | MakerMade M2 | We used a 1/4 in. bit. Each half needs to fit your CNC bed; tile the file if your bed is smaller |
| Cut file | Easel project or SVG | Free |
| Paint | Cheap Home Depot paint in navy blue, white, and a rust orange | Brushes and a cup of water for the rust |
| Large tubing | Everbilt 3/4 in. ID x 1 in. OD x 10 ft clear vinyl tubing | Used for BATES MOTEL, and it held up |
| Small tubing | Everbilt 1/2 in. ID x 5/8 in. OD x 10 ft clear vinyl tubing | Used for NO VACANCY, where our lights failed (see What failed) |
| Lights | Color-changing LED strip lights | Fed through the tubing. The strip we used is no longer sold, so this link is a similar one. |
| Tube fasteners | Commercial Electric 8 in. mountable cable zip ties, natural white, 100-pack | See note below |
| Screws | Small screws | One per cable tie |
| Mounting base | A separate base the sign slides onto | Built to fit our house, so yours will differ |
Scroll the table sideways to see every column
About the tube fasteners. We held the tubing down with white nylon screw-mount cable ties. Each tie wraps around the tubing, and one small screw through the tie's head fastens it to the letter. We used 8 in. ties, which close around the 1 in. tubing with room to spare.
How to build a Bates Motel sign, step by step
Step 1: Download the file and plan around your sheet size
The finished sign is 5.4 ft wide by almost 6 ft tall, which is bigger than a single 4 x 8 sheet of plywood. We split the design into two pieces with a seam running horizontally through the middle of the sign. If you're cutting by hand, print our full-size template on letter paper, tape the pages together, and trace it onto the plywood.
Step 2: Cut the sign on the CNC
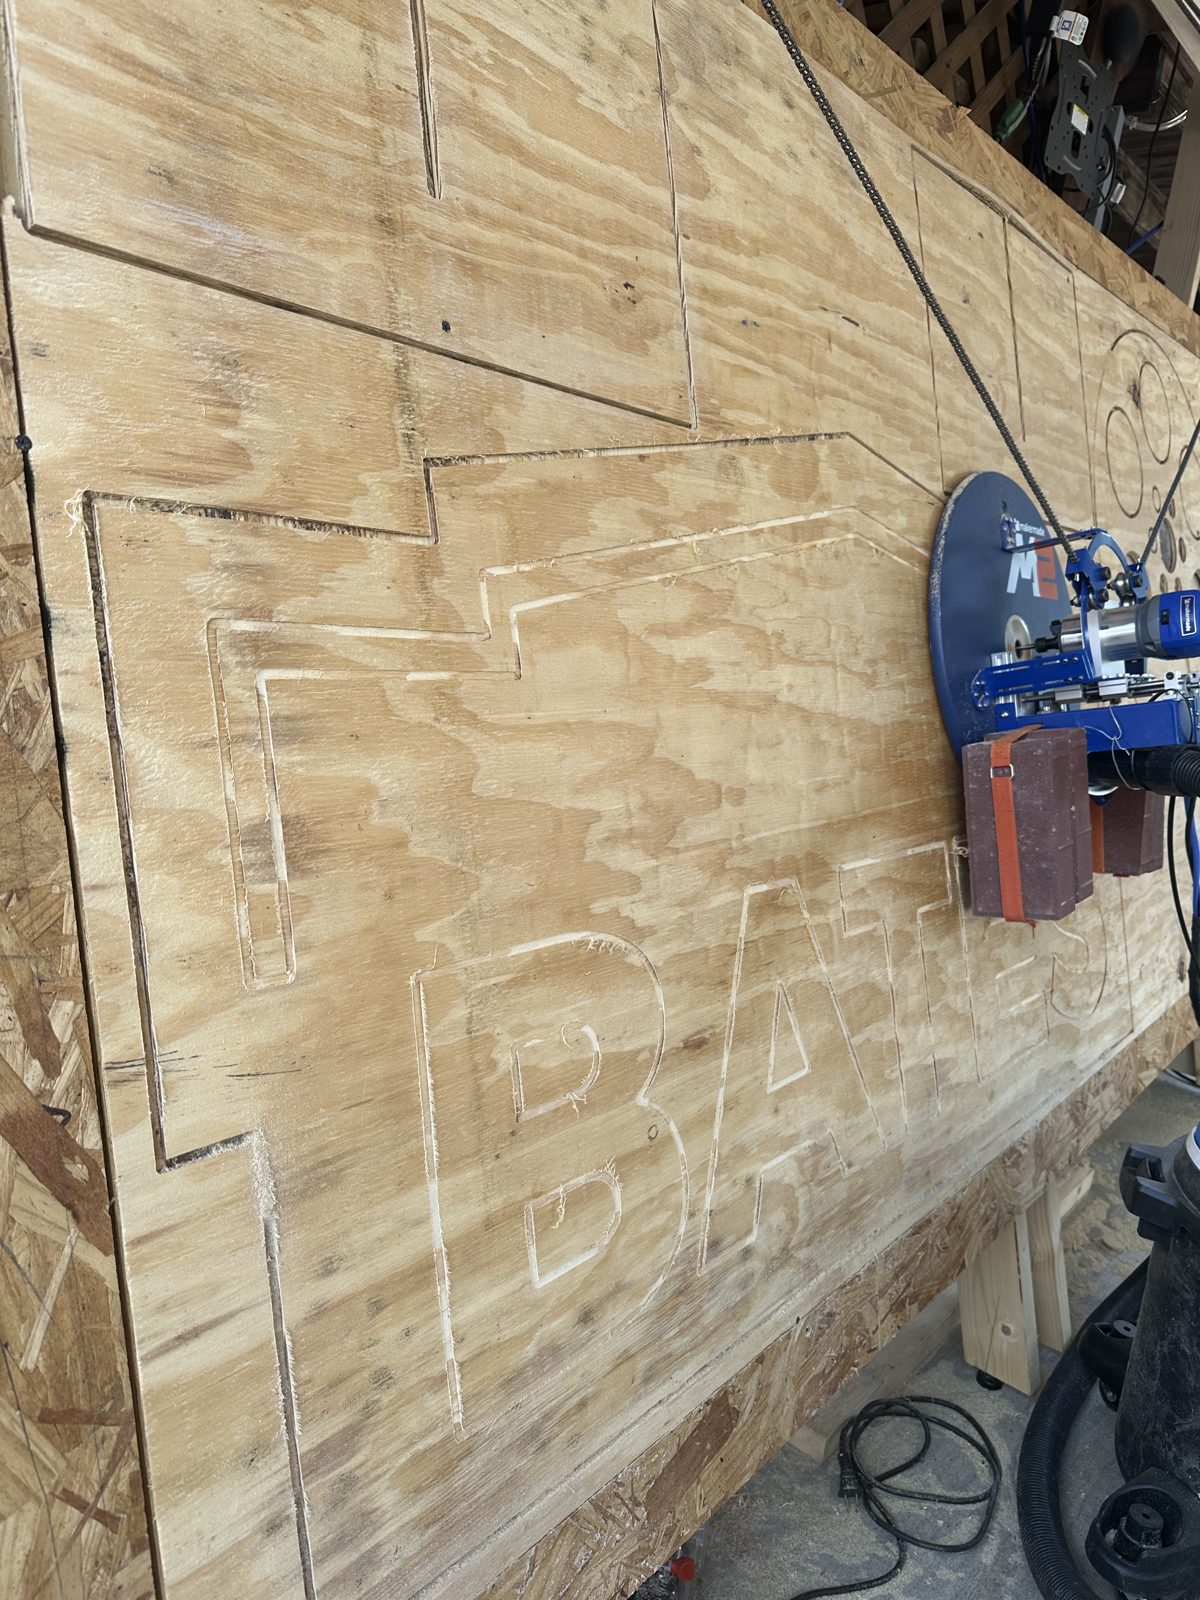
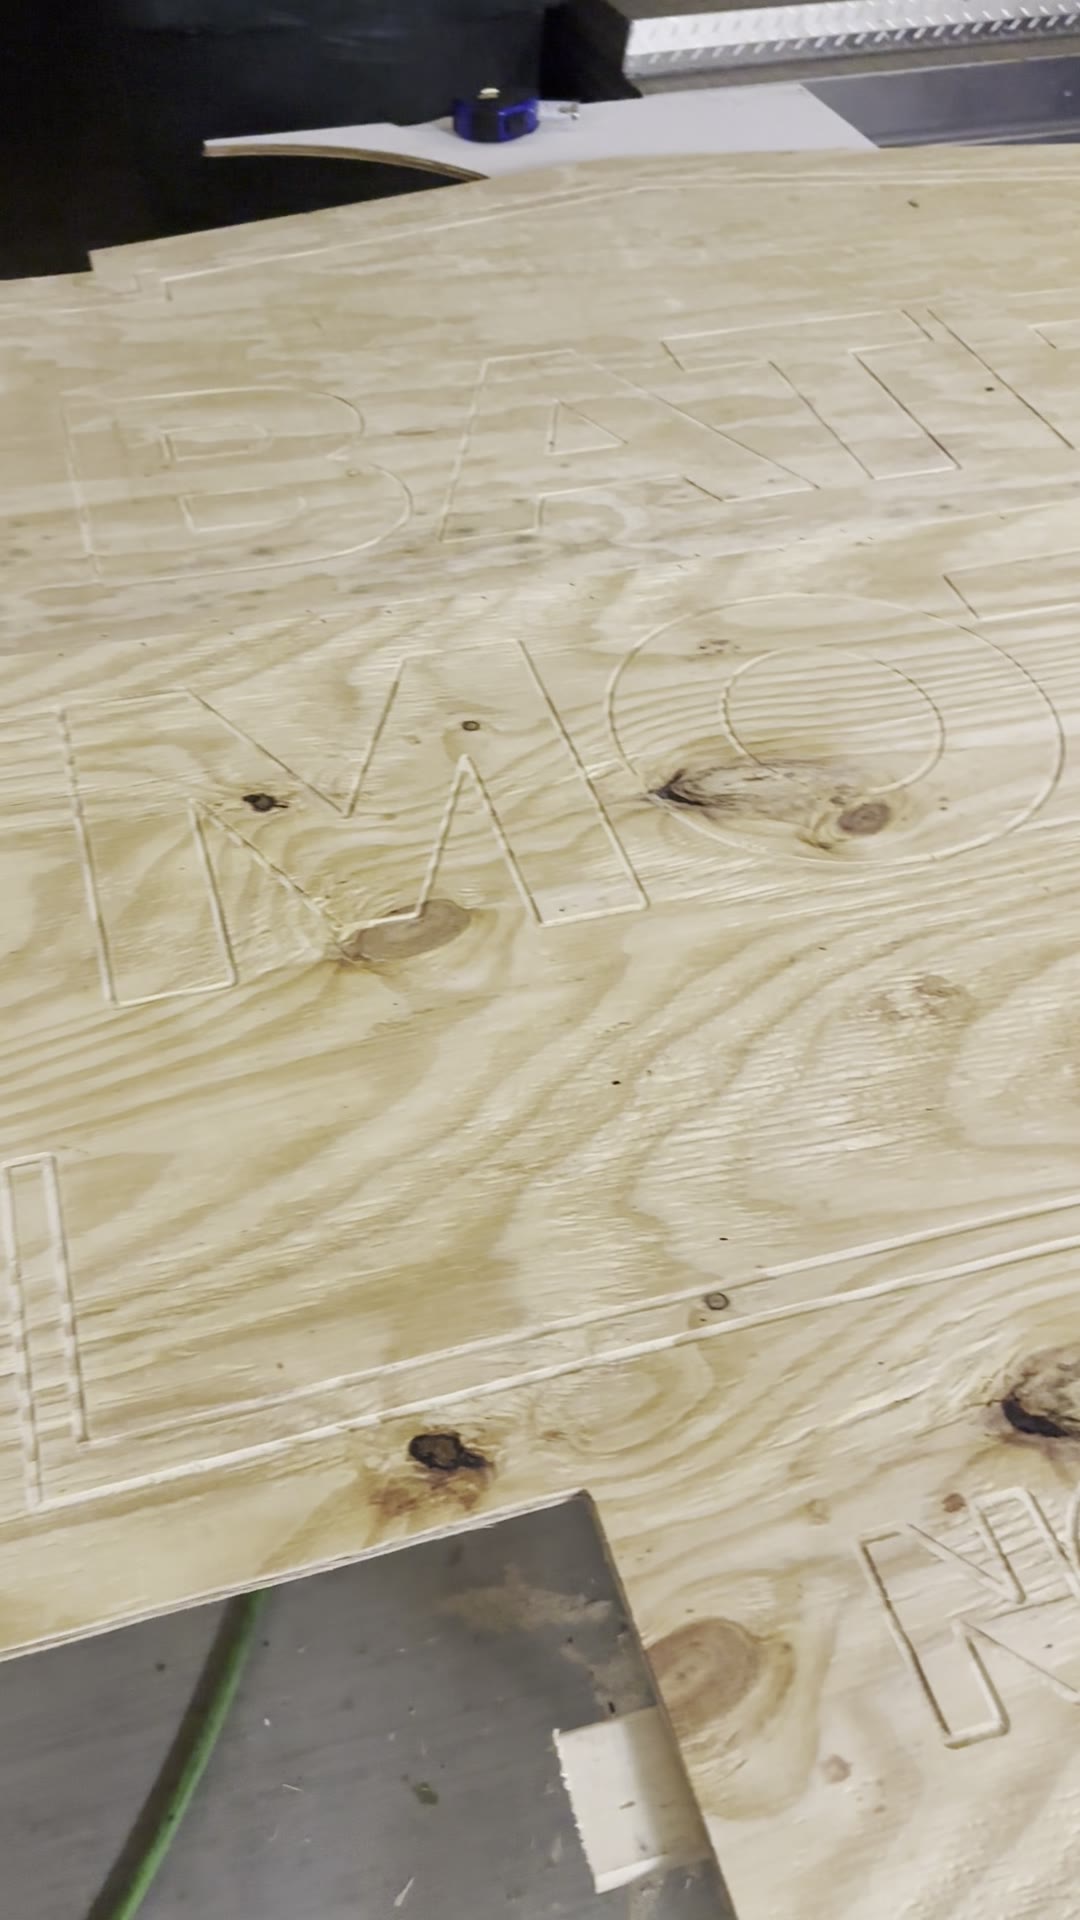
We ran the Easel file on our MakerMade M2 with a 1/4 in. bit, cutting 1/2 in. pine plywood. The machine cuts the sign outline and carves the outline of each letter into the face, so the lettering is etched into the same piece of plywood. Nothing gets glued on.
Step 3: Seam the two halves together
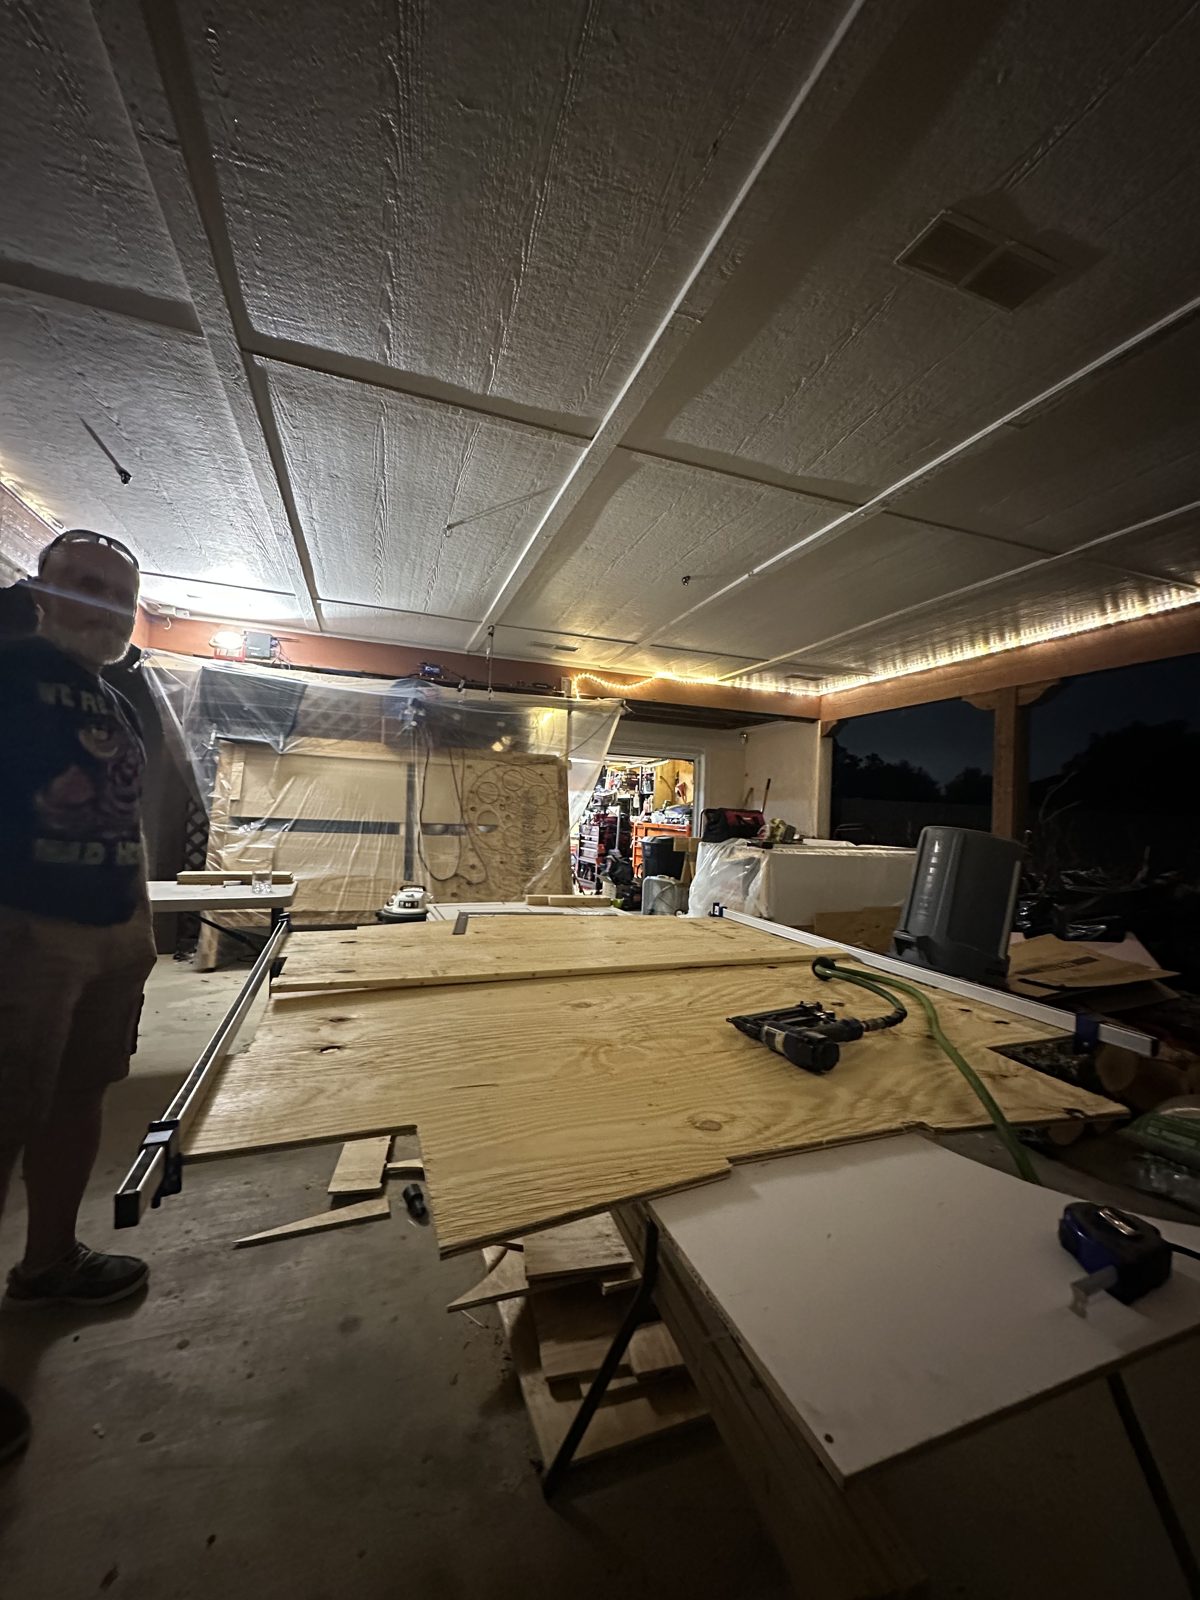
We clamped the two halves together, then ran 1 in. x 2 in. boards along the back of the seam. Each board went on with wood glue, and we nailed it down with a nail gun along the entire seam. A slight visible seam on the front is fine, since on a weathered motel sign it reads like an old panel joint.
Step 4: Paint the base coat and letters
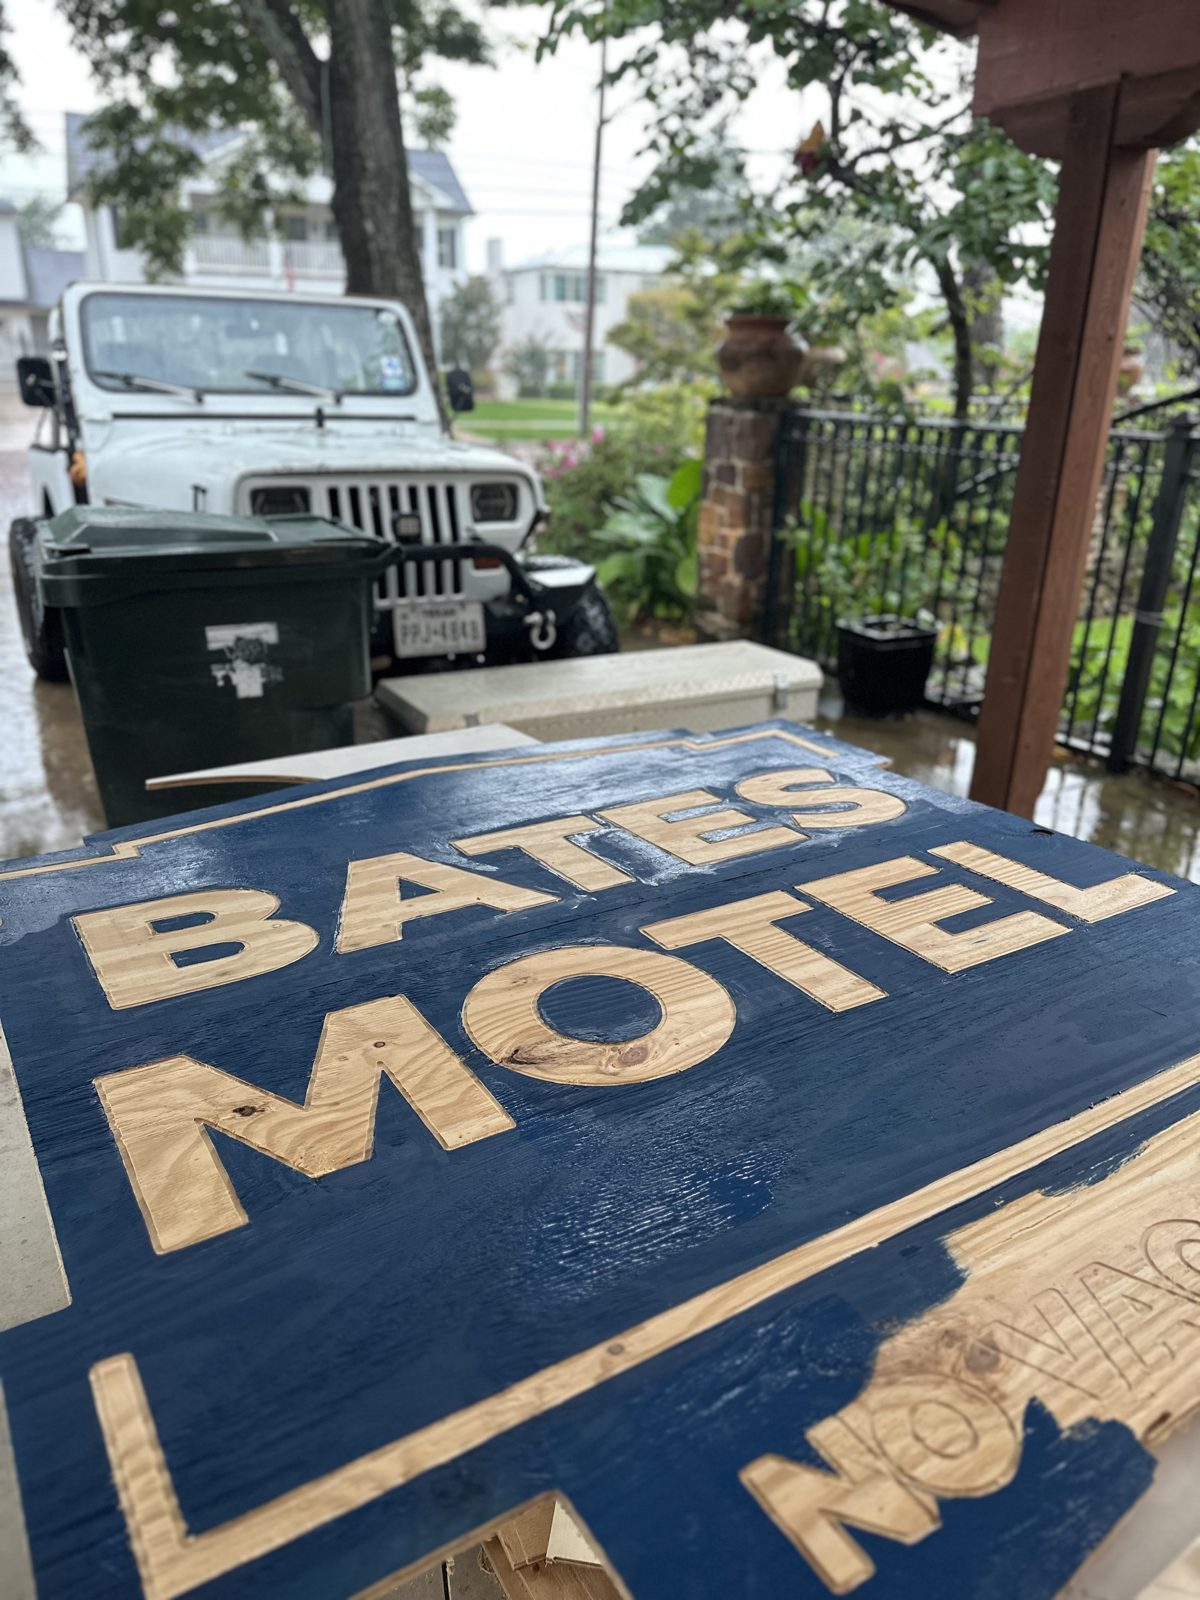
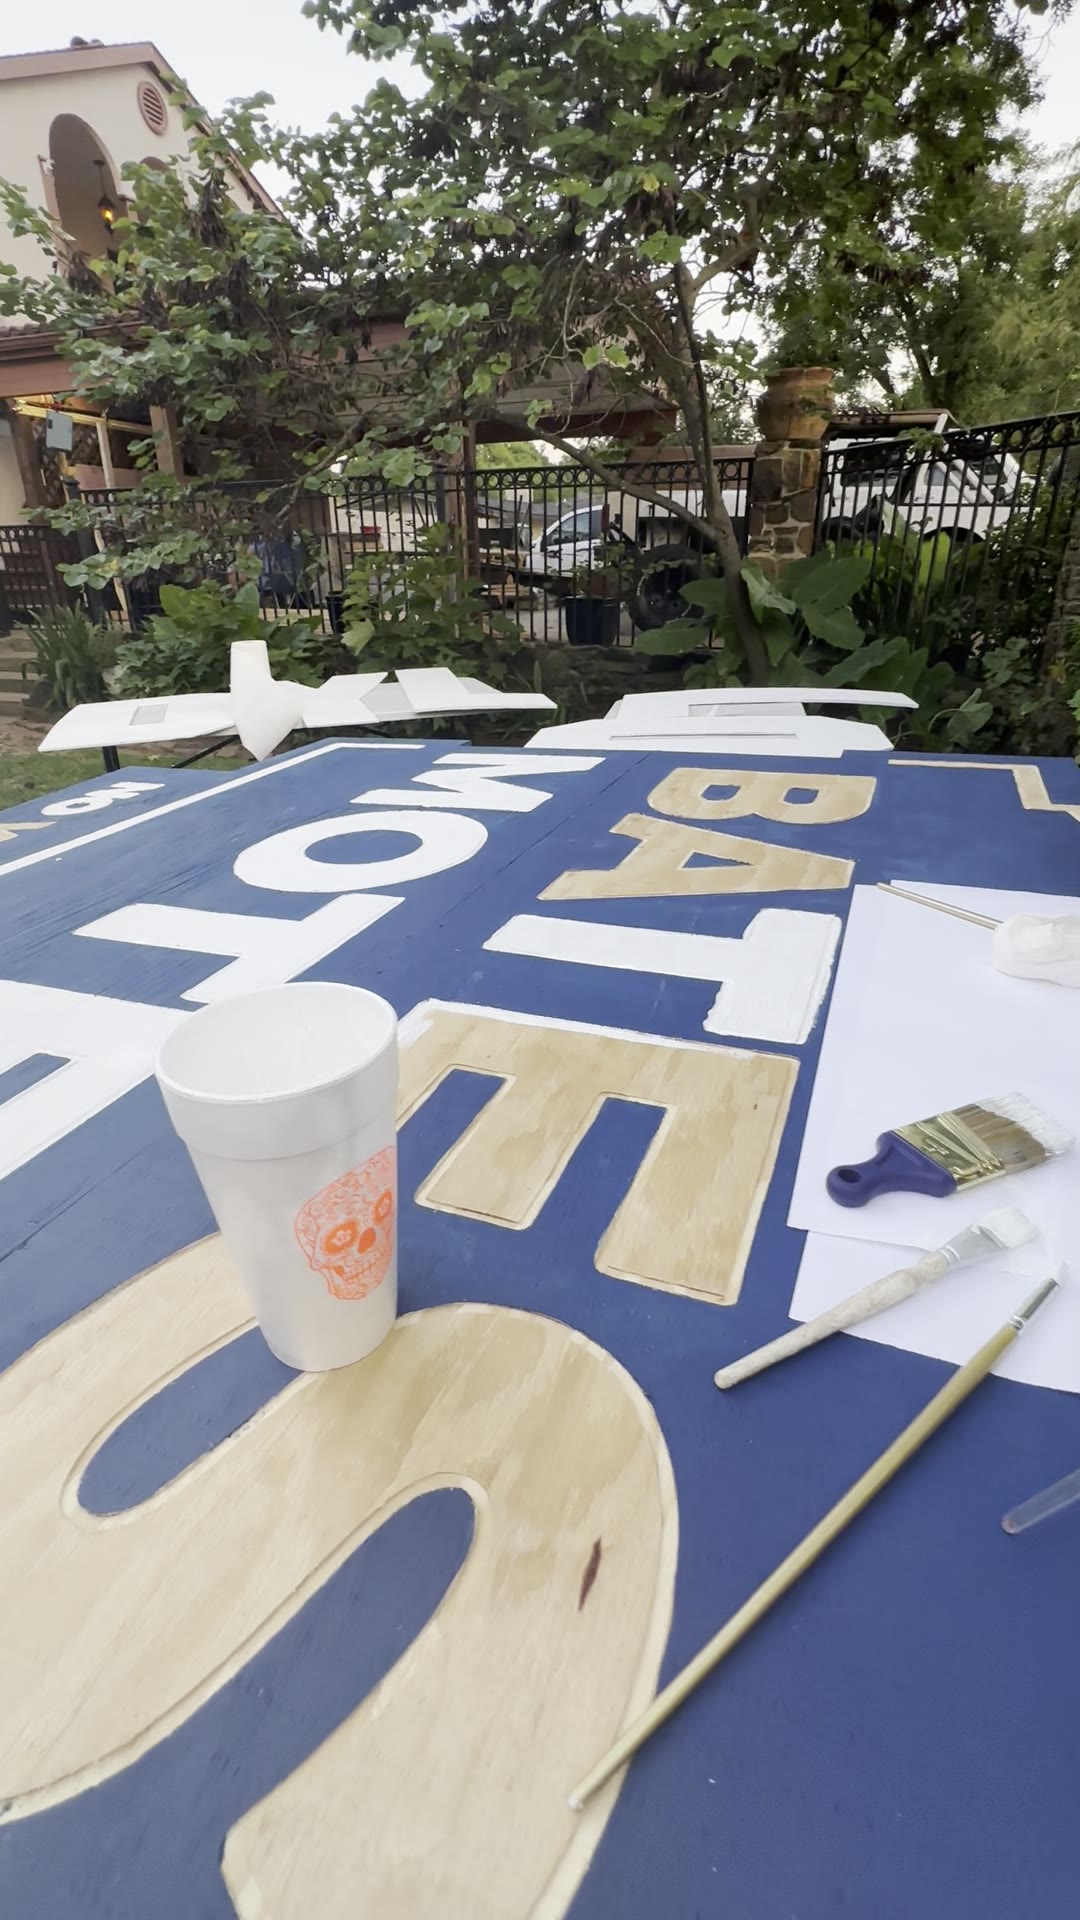
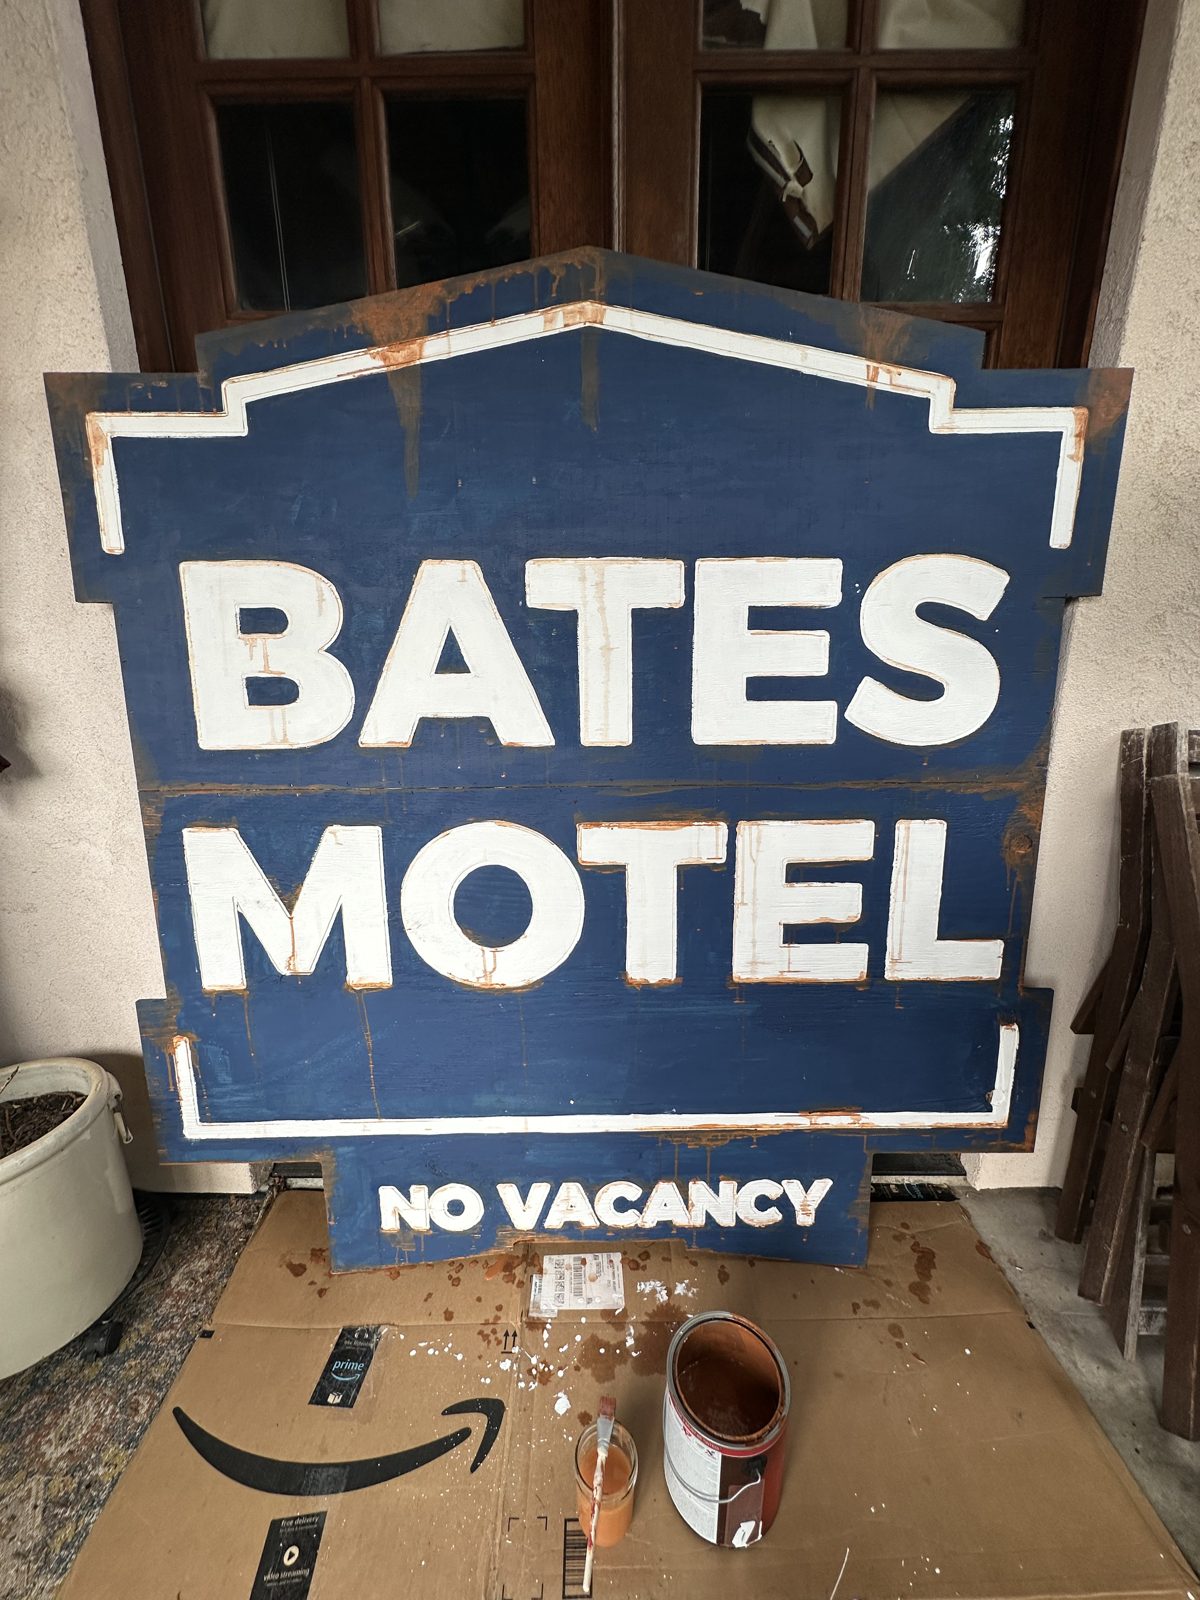
We used regular, inexpensive Home Depot paint. The sign face got a navy blue base coat around the carved letters. Then we painted the letters and border trim white, using the carved lines as the edge.
Step 5: Fake the rust with watered-down paint
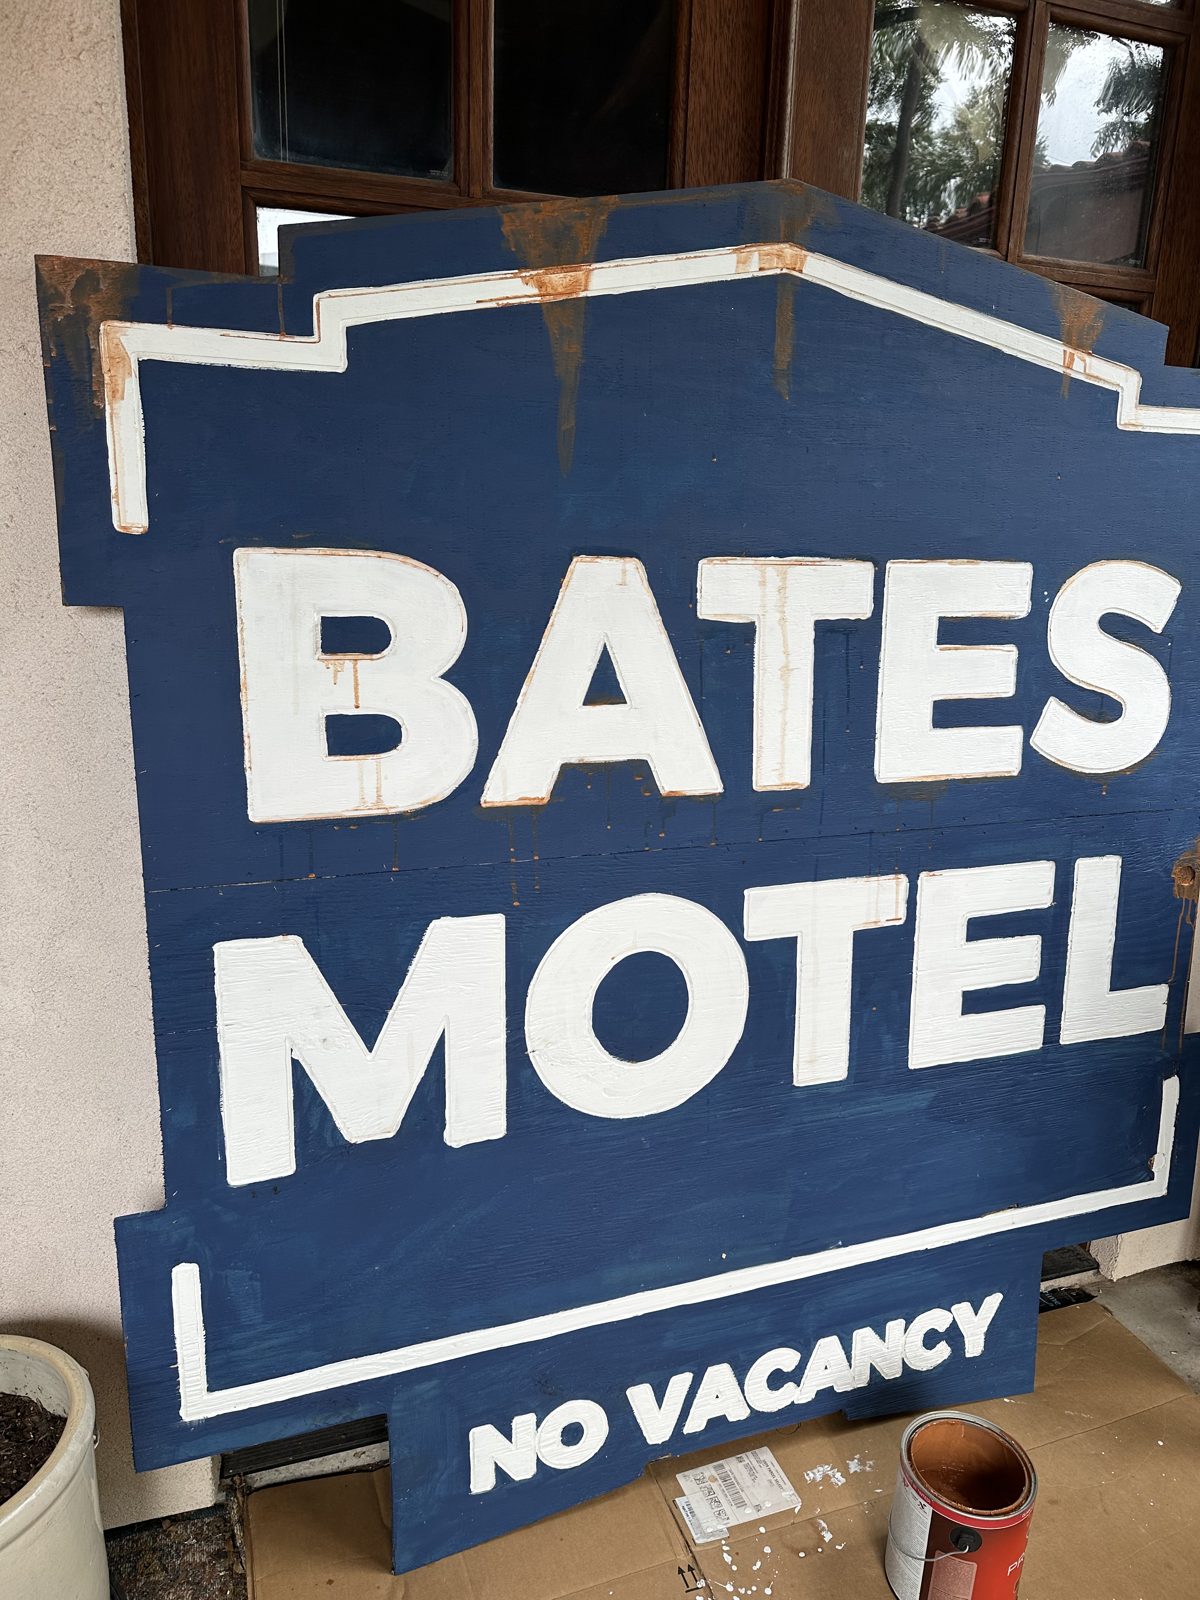
Thin a rust-orange paint with water until it runs, load a brush, and touch it to the top edges of the letters, the trim, and the top of the sign. Let gravity pull it down into drip streaks, with the sign standing upright so the drips run the right direction.
- Start light, since you can add another pass once it dries.
- Hit the edges of the letters and the corners of the trim, where rust would naturally bleed from screws and seams.
- Let each pass dry before deciding if it needs more.
Step 6: Make the faux neon with LED strips in vinyl tubing
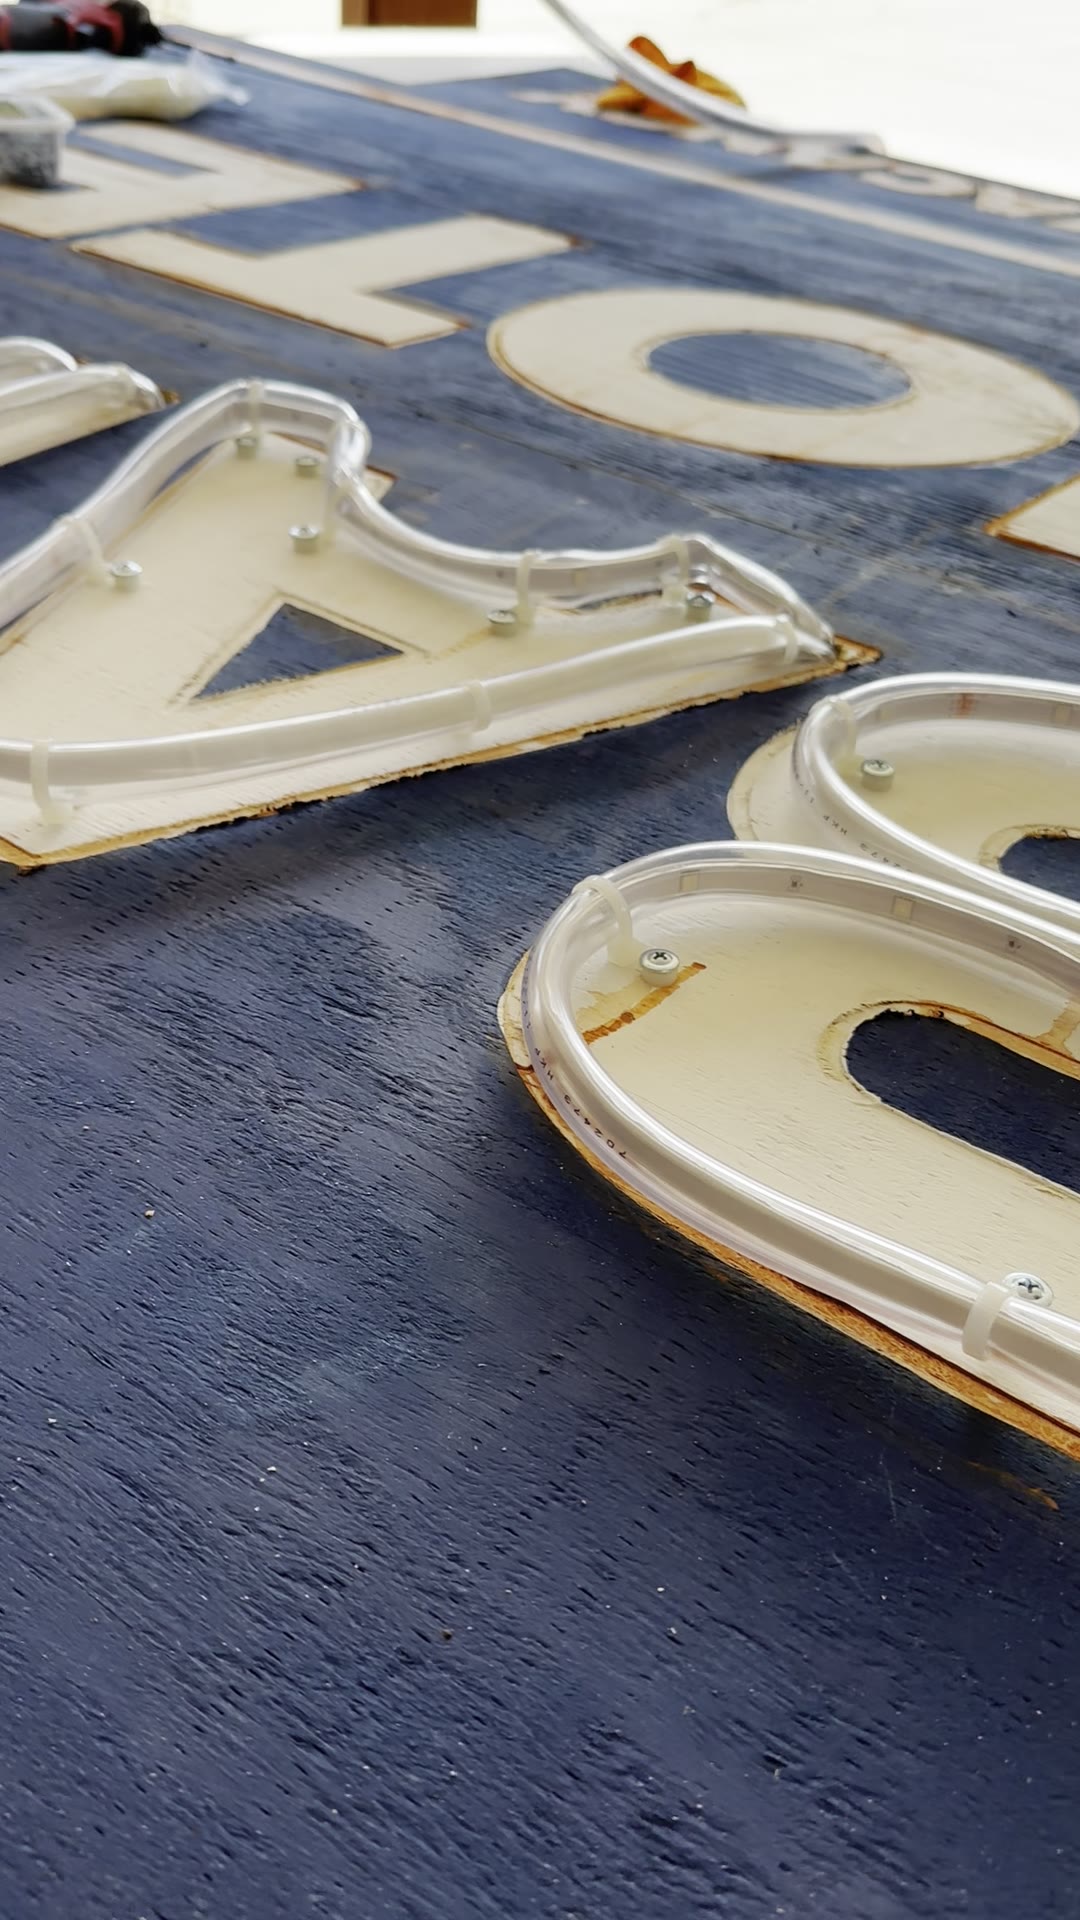
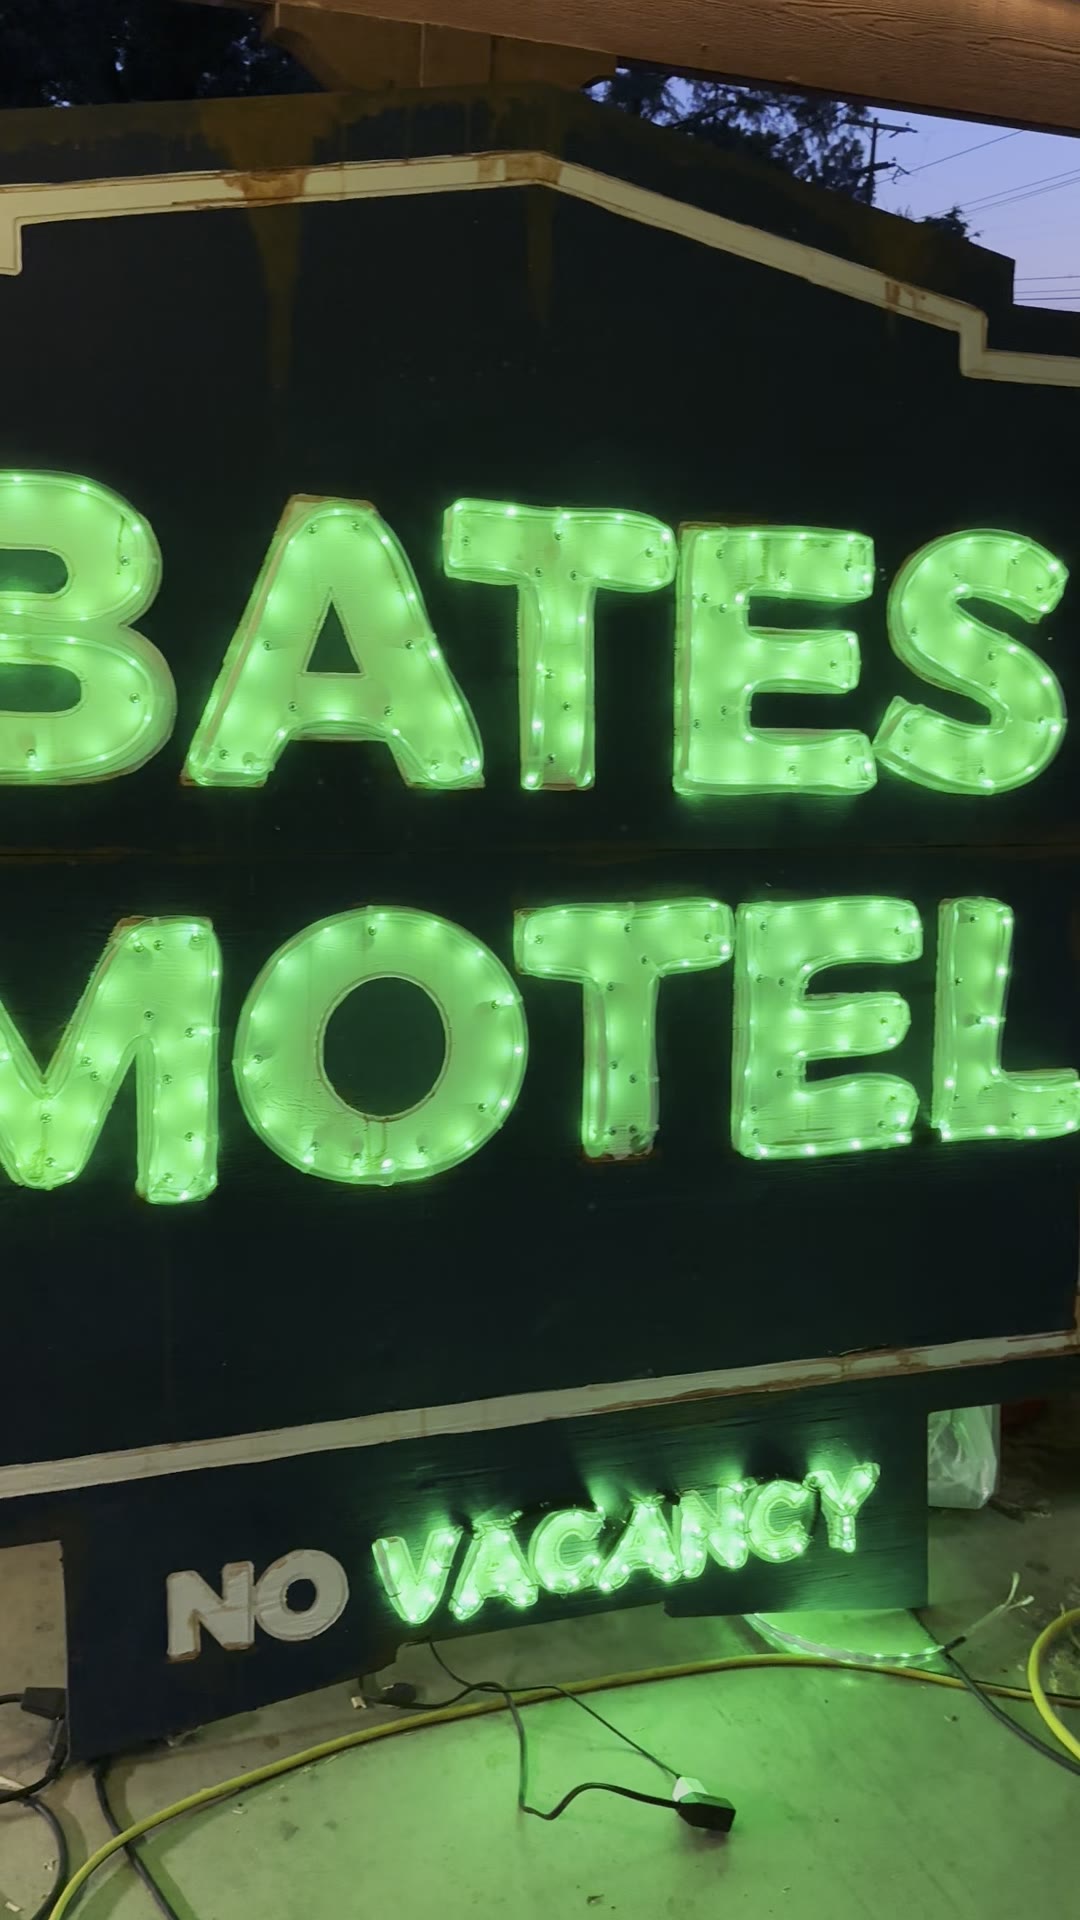
Glass neon is expensive and fragile. To get the old-school tube-lighting look, we fed LED strip lights through clear vinyl tubing. The tubing softens the individual LEDs and gives each letter a round tube profile. At night, the glow along the carved edges makes the flat letters look raised.
Could we have just used rope light? Yes, we could have. We had a different plan for the sign and had already ordered the LED strip, so running it through vinyl tubing was our pivot. If you're starting fresh, you could buy rope light and move on. We build everything with no plans and figure it out as we go, which sometimes sends us down the wrong path and we have to correct course.
- Feed the LED strip into the tubing before you mount anything. Pull it through slowly so the strip doesn't kink.
- Lay the tubing around the inside edge of each letter.
- Fasten it down at intervals with screw-mount cable ties and small screws.
- Drill small holes through the letters and sign so the tube can pass in and out between letters. This lets the tube travel from one letter to the next.
- Run the power lead out the back and test before you hang it.
We used 3/4 in. ID x 1 in. OD tubing for BATES MOTEL and 1/2 in. ID x 5/8 in. OD tubing for the smaller NO VACANCY letters.
Step 7: Mount it
All of our signs hang on a separate base that slides over the part of our house where it mounts, so the sign doesn't damage the house. How you mount yours depends on where it's going: a porch, a fence, a frame in the yard, or a wall. Whatever you choose, plan for wind, because a 6-foot sign catches a lot of it.
What failed (so yours doesn't)
The NO VACANCY lights died after a few days. We paired tubing that was too small with an LED strip that was too cheap, and the connection broke off. The BATES MOTEL letters, in the larger 3/4 in. tubing, kept working.
What we'd do differently:
- Use the larger tubing wherever it fits. Pick tubing the strip slides into without forcing, even on the small letters.
- Buy a better-quality LED strip, especially for small letters, with a sturdier connector.
- Protect the connections. Keep connectors out of tight bends and give the lead some slack so it isn't pulling on the joint.
- Run a test before Halloween. Ours looked fine on day one and failed a few days later, so run yours for a week before the season starts.
Design tip: wire NO and VACANCY on separate strips. With NO dark and VACANCY glowing in a different color, it reads like a half-broken roadside sign.
Bates Motel sign FAQ
How big is the Bates Motel sign?
Ours is 5.4 feet wide and almost 6 feet tall. You can scale the SVG up or down; at under 4 feet wide it fits on a single 4 x 8 sheet of plywood with no seam.
Do I need a CNC to make this sign?
No. The CNC saves time and carves the letters for you, but you can print our free 70-page template on letter paper, tape it together, trace it onto plywood, and cut it with a jigsaw.
How do you make a faux neon sign with LED strips?
Feed an LED strip light through clear vinyl tubing, then fasten the tubing around the edge of each letter with screw-mount cable ties. The tubing softens the LEDs into a glowing line that reads like neon from the street.
What size vinyl tubing works for faux neon?
3/4 in. ID x 1 in. OD held up for us. With 1/2 in. ID tubing and a cheap strip, our connection broke after a few days.
Can I use rope light instead of LED strip in tubing?
Yes. Rope light already comes inside a clear tube, so you skip feeding a strip through vinyl tubing. We went with strip in tubing because we had already bought the strip for a different plan.
How do you make wood look rusted for a Halloween prop?
Water down rust-orange paint until it runs, touch it to the top edges of the letters and trim, and let it drip down with the sign standing upright.
What paint did you use?
Regular, inexpensive paint from Home Depot: a navy blue base, white for the letters and trim, and a rust orange for the drips.
How do you mount a large Halloween sign without damaging the house?
We build a separate base that slides over the mounting spot so the sign doesn't damage the house. The right method depends on your house and location.
Are the cut files free?
Yes. The Easel CNC project, the SVG, and the printable template are free to download and use for your own haunt.
Get the free files
Building your own?
Stuck on the lighting, the rust, or how to hang a 6-foot sign without upsetting your house? Ask us on TikTok, where we're most active, or send a DM on Instagram. Include a photo of your build and we'll help you work through it. Tag us when it's finished so we can share it.
This year we're building Coraline, and those props, rigs, and facades are next on the giveaway list. If you're near Tyler, come see it in person on Saturday, October 31. It's free, all ages, rain or shine.
Built by hand. All of it.